The biggest mistake people make with ultra short throw projectors is improper placement, which causes distorted images, focus issues, and shadows. To get a clear, bright picture, you need to measure the correct distance based on your projector’s specs, adjust the height and angle properly, and verify it’s aligned with a suitable screen. Proper setup can be tricky but mastering these tips will make a huge difference—keep going to learn more.
Key Takeaways
- Proper placement requires positioning the projector close to the wall, typically 12–24 inches away, based on the throw ratio.
- Mount the projector at or slightly above eye level and ensure it is level to prevent keystone distortion.
- Use adjustable, secure mounts to maintain stability and avoid misalignment or accidental dislodging.
- Keep obstructions like furniture and décor away from the projection path to prevent shadows and image interference.
- Regularly calibrate focus, keystone correction, and alignment to ensure sharp, distortion-free images.
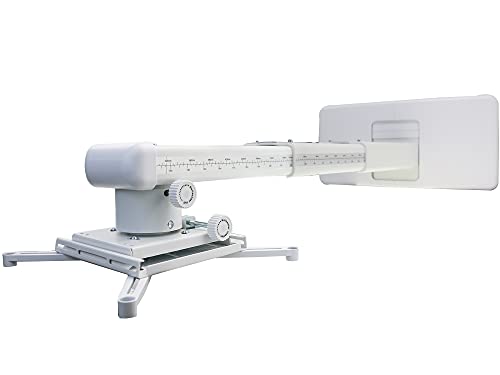
NC Projector Wall Mount with Universal mounting ,Telescopic Bracket Hanger,33lbs Load Capacity,High-Precision Adjustable: (12.8’’-29.13’’),white,(TYYZJ02)
ultra Short Throw Projection,Most sturdy of all, great fine tune knobs, best manual (very very detailed),It has the…
As an affiliate, we earn on qualifying purchases.
As an affiliate, we earn on qualifying purchases.
Why Proper Placement Is Key for Your Ultra Short Throw Projector

Proper placement is essential because it directly affects the image quality and overall viewing experience of your ultra short throw projector. Correct mounting options ensure your projector is stable and positioned at the ideal height and angle. You should consider wall compatibility to avoid issues like uneven surfaces or obstructions that can distort the image. Choosing the right wall for mounting helps maximize image clarity and brightness, reducing the risk of shadows or misalignment. Whether you opt for a fixed mount or an adjustable bracket, ensure it supports your projector’s weight and size. Proper placement allows the projector to project a clear, crisp image onto your screen or wall, creating an immersive viewing experience without the hassle of constant adjustments. Additionally, leveraging innovative European cloud servers can enhance your home automation and media streaming capabilities, ensuring a seamless and sustainable entertainment setup. Paying attention to projection angle and ensuring it is correctly aligned can further improve image sharpness and prevent distortion, making your viewing more enjoyable.

StarTech.com Universal Projector Wall Mount – Projector Mount supports Short & Ultra Short Throw Projectors up to 33lb (15kg) – Tilt/Swivel/Rotate – Adjustable 16.5" to 27.7" from Wall, TAA
UNIVERSAL PROJECTOR WALL MOUNT: Supports short throw & ultra-short throw projectors w/ mounting hole pattern ranging up to…
As an affiliate, we earn on qualifying purchases.
As an affiliate, we earn on qualifying purchases.
The Most Common Placement Mistakes That Distort Your Image

One of the most common mistakes that can distort your image is incorrect projector placement, especially when the projector is too close or too far from the screen. Poor positioning can cause focus issues, keystone distortion, or uneven image quality. Additionally, choosing the wrong mounting options—such as an unstable wall mount or ceiling bracket—can lead to misalignment and image distortion. Ambient lighting also plays a vital role; bright rooms or uncontrolled lighting conditions wash out the image, reducing contrast and clarity. To avoid these pitfalls, ensure your projector is mounted securely at the correct height and distance, and manage ambient lighting to keep it from interfering with picture quality. Proper placement eliminates common distortions and guarantees a sharp, vibrant image.

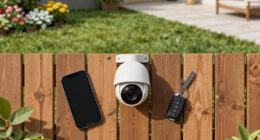
DSLRKIT Lens Focus Calibration Tool Alignment Ruler Folding Card(Pack of 2)
This compact ruler allows you to determine if your lens is auto-focusing accurately as it should. It is…
As an affiliate, we earn on qualifying purchases.
As an affiliate, we earn on qualifying purchases.
How to Measure the Correct Distance for Your Ultra Short Throw Projector

To guarantee your ultra short throw projector delivers a clear, focused image, measuring the correct distance from the screen is key. First, consider the mounting height, which directly affects projector height. Position the projector close enough to the wall or screen to fill the image without distortion, typically between 12 to 24 inches from the wall, depending on your model’s throw ratio. Use the manufacturer’s specifications to determine the ideal distance, which correlates with your projector height—how high it’s mounted from the floor. Measure carefully to ensure alignment, keeping in mind that too close or too far can cause focus issues or keystone distortion. Precise measurement ensures precise image size, clarity, and minimal adjustment later.

WALI Universal Projector Screen Ceiling Mount, Wall Hanging Mount L-Brackets, 6 inch Adjustable Extension with Hook Kit, Perfect Projector Screen Placement Hold up to 66 lbs (PSM001-W), White
Application: Fits most manual or spectrum projector screen on the market. Support maximum loading weight up to 66lbs…
As an affiliate, we earn on qualifying purchases.
As an affiliate, we earn on qualifying purchases.
Ideal Height and Angle for a Clear, Distortion-Free Picture

To get a clear, distortion-free picture, you need to set your projector at the right height and angle. Make certain it’s positioned at an ideal projection height to avoid unnecessary adjustments later. Adjust the tilt angle carefully to prevent keystone distortion and ensure your image stays perfectly aligned. Additionally, using adaptive calibration features can help optimize image quality based on the room’s lighting and surface conditions. Proper placement also minimizes the need for manual adjustments, saving time and effort during setup.
Optimal Projection Height
Achieving a clear, distortion-free picture with your ultra short throw projector depends heavily on setting the ideal projection height and angle. Your mounting height is vital—place the projector close enough to the wall to avoid distortion but high enough to project onto the screen comfortably. Typically, mounting it at or just above eye level ensures the image remains level and sharp. Wall placement also influences this height; positioning the projector directly in front of the screen minimizes keystone effects and ensures consistent focus. Use a level to verify the height aligns with the center of your projection surface. Remember, too high or too low mounting height can cause image distortion or uneven focus, so precise placement is key to superior picture quality. Proper tool setup and understanding of the projector’s specifications can further improve image clarity and alignment.
Proper Tilt Angle
Ensuring your projector delivers a clear, distortion-free image requires setting the proper tilt angle along with the correct height. The ideal mounting height and tilt guarantee your image remains straight and sharp without keystone correction. Keep the projector level to avoid skewed visuals. Adjust the tilt angle so the lens points directly at the screen’s center, minimizing distortion. Consider the wall color; a light or neutral wall helps reflect the image evenly, reducing the need for excessive angle adjustments. Proper tilt prevents shadowing and guarantees even focus across the screen. Remember, a slight downward tilt from a higher mounting point often provides the best picture quality. Fine-tuning these factors delivers a crisp, distortion-free display for a perfect viewing experience. proper tilt angle is crucial for minimizing keystone distortion and shadowing, ensuring the best image quality. Additionally, verifying that your projector’s installation height aligns with the manufacturer’s recommendations can prevent common setup issues. Ensuring correct projector placement can significantly improve overall picture clarity and reduce the need for adjustments later.
Avoiding Keystone Distortion
Keystone distortion occurs when the projector is positioned at an angle that causes the image to appear trapezoidal rather than rectangular. To avoid this, carefully choose your mounting height and angle. Keep the projector as level as possible, ideally at or slightly above the center of the screen, to minimize keystone effects. Adjust the mounting height so the lens is aligned with the middle of the projection area, reducing the need for extreme tilting. Additionally, consider the wall color; a neutral, matte surface helps maintain image clarity and contrast, preventing distortions caused by reflections or uneven coloring. By positioning your projector at the right height and angle, and paying attention to wall color, you ensure a clear, distortion-free picture without the need for extensive correction.
Choosing the Best Surface and Screen for Your Setup

Choosing the right surface or screen is essential for getting the clearest, brightest image from your ultra short throw projector. The projection angle and screen texture considerably impact image quality. The type of surface you select can significantly influence the brightness and clarity of your projection. A smooth, matte surface minimizes glare and diffuses light evenly, enhancing clarity. Consider screens designed specifically for ultra short throw projectors, which reduce distortion and improve focus. Avoid glossy or highly textured surfaces that can distort images or create unwanted reflections. Proper positioning of your projector relative to the screen also affects projection angles, so ensure your setup allows for a straight, perpendicular alignment. Additionally, understanding the importance of projection surface helps ensure your images stay sharp, vibrant, and correctly aligned, making your viewing experience seamless and enjoyable. Being aware of air quality factors can also help maintain optimal projector performance, as dust and pollutants can impact image clarity and device longevity. Regular cleaning of the projection surface and surrounding environment can further enhance image quality and prevent dust buildup. Incorporating a suitable screen material tailored for ultra short throw projections can further optimize your viewing results.
How to Adjust Keystone and Focus for the Perfect Image

To achieve a sharp, distortion-free image, you need to fine-tune your projector’s keystone and focus settings carefully. Start with lens calibration by adjusting the keystone to straighten the image and correct any trapezoidal distortion. Use your projector’s keystone correction feature to fine-tune the shape without moving the device. Next, focus the lens until the image appears crisp and clear across the entire surface. Proper image sharpening depends on precise focus adjustments, so take your time to get it just right. Small tweaks can notably improve picture quality, making details sharp and colors vibrant. Remember, accurate lens calibration ensures the projected image isn’t distorted, while proper focus brings out the maximum clarity, resulting in a picture that’s both perfectly aligned and razor-sharp.
Troubleshooting Shadows and Obstructions in Your Ultra Short Throw Setup

Shadows and obstructions can ruin your ultra short throw setup, but you can fix them with proper placement. Start by identifying what’s causing the blockage, whether it’s furniture or mounting issues. Then, adjust your projector’s position or screen to keep the view clear and avoid future problems. Ensuring your projector is correctly aligned with a suitable surface can make a significant difference in image quality and clarity, especially when considering sturdy mounting options. Additionally, using free floating techniques can help minimize potential obstructions and allow for more flexible placement. Incorporating mount, OTA, and camera comparisons with field‑of‑view and imaging‑scale examples can also help you better understand how to position your setup for optimal viewing and minimal shadows.
Proper Placement Techniques
Ensuring proper placement of your ultra short throw projector is essential to avoid shadows and obstructions that can ruin your viewing experience. To do this, carefully choose your mounting brackets and make certain they are securely installed at the correct height and angle. Proper projector calibration helps optimize image clarity and prevents distortion or shadows caused by misalignment. Additionally, understanding the principles of heat distribution can help in selecting appropriate mounting locations that prevent overheating and ensure consistent performance. Proper placement also involves considering the environmental factors that can affect heat dissipation and device longevity. Consider these key techniques:
- Use sturdy, adjustable mounting brackets for precise positioning.
- Keep the projector as close to the wall as possible without obstructing the throw distance.
- Regularly calibrate the projector to maintain focus and alignment, reducing shadows caused by misplacement.
Identifying Obstruction Sources
Since obstructions can easily disrupt your viewing experience, it’s important to pinpoint their sources early on. Check your mounting height first—if the projector is too low or too high, objects like furniture or decor can cast shadows. Also, examine your wall color; dark or textured walls can cause uneven projection and shadows. Look for anything in the path of the projected image, such as picture frames, shelves, or hanging plants, and adjust their positions if possible. Remember, even small items can create noticeable shadows. By identifying these potential sources, you can plan to remove or reposition obstructions, ensuring a clear and sharp image. Early detection helps prevent shadows and saves you time and frustration later in your setup process.
Adjusting Screen and Mounting
Once you’ve identified potential sources of obstruction, the next step is to adjust your screen and mounting setup to minimize shadows and guarantee a clear image. Proper mounting height and screen alignment are vital. Ensure the projector is mounted at the ideal height so the lens is level with or slightly below the bottom of the screen. Adjust the screen alignment to keep it perfectly flat and centered, reducing distortions and shadows.
- Set the mounting height to avoid casting shadows during use
- Use a level to align the screen precisely with the projector
- Fine-tune the projector’s position for optimal screen coverage and minimal obstruction
These adjustments will help eliminate shadows and ensure your image stays sharp and clear.
Tips to Keep Your Projector in the Right Spot Over Time

To keep your ultra short throw projector in the right spot over time, regular adjustments are essential. Start by checking your mounting options—whether you’ve chosen wall mounting or another method—since slight shifts can affect image quality. If you have a wall-mounted projector, ensure it remains securely attached and hasn’t shifted due to vibrations or wall settling. Periodically verify the projector’s position relative to the screen, adjusting as needed to maintain proper alignment. Keep an eye on mounting hardware and tighten any loose screws. If your setup uses adjustable mounts, take a moment every few months to fine-tune the projector’s position. Staying proactive prevents image distortions and guarantees consistent, crisp projection over time. Additionally, being aware of dust accumulation and cleaning can help you understand how to maintain a clean environment, free of dust that could affect your projector’s performance. Regular maintenance, including monitoring dust buildup, and understanding proper placement techniques ensures optimal image clarity and prolongs your projector’s lifespan.
How Room Lighting and Furniture Affect Your Projector’s Image Quality

Room lighting and furniture play a crucial role in your projector’s image quality, as they can greatly influence contrast, brightness, and overall clarity. Excessive ambient lighting washes out the picture, so controlling it with dimmers or blackout curtains helps maintain vivid images. Furniture placement also matters; avoid blocking the projector’s throw path or light path to prevent shadows and glare. Here are key considerations:
- Minimize ambient lighting sources in the viewing area
- Position furniture to avoid reflections or shadows on the screen
- Use dark or matte furniture to reduce light reflection
- Understanding indoor air quality can improve overall comfort and focus during viewing sessions.
Expert Checks to Ensure Your Projector Is Positioned for the Best Picture

Make certain your projector is positioned at the correct distance from the screen to avoid distorted or blurry images. Check that it’s properly aligned to ensure the picture is centered and square. These expert checks will help you get the sharpest, most balanced picture possible. Additionally, consider smart appliance integration to automate and optimize your setup for the best viewing experience. Proper placement is also essential, as installation accuracy can significantly impact overall picture quality and viewing comfort.
Correct Placement Distance
Ensuring your projector is placed at the correct distance is essential for achieving the best picture quality. If you’re too close, the image may be distorted or blurry; too far, and it’ll lose clarity and brightness. To get it right, consider your projector’s specified throw ratio and adjust accordingly. Proper placement also involves secure mounting options that keep the projector stable and aligned. Good cable management prevents accidental disconnections or clutter, which can affect image quality.
- Confirm the recommended distance from the screen based on your projector’s specifications
- Use adjustable mounting options for precise positioning
- Organize cables to avoid interference with the image or projector stability
Proper Screen Alignment
To achieve the best picture quality, it’s crucial to verify that your projector is properly aligned with the screen. Start by checking the mounting height; your projector should be mounted at the correct height to ensure a level, straight image. Incorrect mounting height can lead to keystone distortion or uneven edges. Next, focus on projector orientation—make sure it’s perfectly perpendicular to the screen and centered horizontally. Adjust the lens shift or keystone settings if necessary, to align the image without distortion. Use a level or alignment tool to confirm the projector’s position, and double-check that the image fills the screen evenly from top to bottom and side to side. Proper alignment minimizes image warping and guarantees ideal picture quality.
Frequently Asked Questions
Can I Place My Ultra Short Throw Projector on a Movable or Adjustable Mount?
Yes, you can place your ultra short throw projector on a movable or adjustable mount. Make sure the mounting provides stability to prevent movement during use, which can affect image quality. Look for mounts with good mounting stability and consider portability options if you need to move it frequently. An adjustable mount also lets you fine-tune the projector’s position easily, ensuring ideal projection without sacrificing stability or convenience.
Is Wall Color or Texture Important for Optimal Image Quality?
Wall color and texture are essential for peak image quality with your ultra short throw projector. You should choose a wall with a neutral, matte finish, such as light gray or beige, to reduce glare and enhance contrast. Avoid glossy or textured surfaces, as they can distort images. Smooth, flat walls with minimal texture help guarantee sharp, vibrant visuals, giving you the best viewing experience.
How Often Should I Recalibrate or Adjust My Projector’s Placement?
You should recalibrate your projector’s placement and follow an adjustment schedule every few months or after any major room changes. Calibration frequency depends on factors like bulb usage, room lighting, and projector shifts. Regular checks ensure superior image quality, so don’t wait too long. Keep an eye on image clarity and alignment, and recalibrate promptly if you notice any distortion or dimness to maintain the best viewing experience.
Are There Specific Room Layouts That Enhance Projector Performance?
Think of your room as a stage for your projector’s performance. Narrow rooms with ample space between the projector and the wall, along with flexible seating arrangements, allow light to dance freely and form sharp images. Ideal room dimensions help avoid distortion, while well-planned seating keeps viewers in the spotlight’s perfect focus. Avoid cluttered layouts—clear, spacious rooms turn your projector into a star, ensuring the best picture quality.
Can Furniture Placement Impact Projector Image Clarity and Uniformity?
Yes, furniture placement can considerably impact your projector’s image clarity and uniformity. If you block the projector’s path with furniture, it causes obstruction, leading to shadows or uneven images. Additionally, placing furniture where glare interference occurs can wash out the display, reducing contrast and sharpness. To guarantee ideal performance, keep the area in front of the projector clear and avoid reflective surfaces that can cause glare interference.
Conclusion
Getting your ultra short throw projector just right might feel like assembling a spaceship, but with proper placement, you’ll enjoy a crisp, distortion-free image every time. Remember, precision beats guesswork—measure carefully, choose the right surface, and watch out for shadows. Think of it as your own personal Jumbotron—keep it in the perfect spot, and you’ll be the star of your home theater. Now, go ahead and make your setup legendary!