
To make certain your dash cam wiring looks factory-style, plan your route carefully along existing trim and behind panels, using tools like pry bars and cable clips for a seamless finish. Secure all wires tightly with zip ties or adhesive mounts, hiding them in gaps or behind interior panels for a clean look. Use connectors for secure, neat joins, and test everything thoroughly to verify proper operation. If you keep going, you’ll discover how to achieve a professional, hidden wiring setup.
Key Takeaways
- Route wires along existing trim and panels for a seamless, factory-like appearance.
- Use adhesive mounts, cable clips, and zip ties to secure wiring discreetly.
- Plan wiring paths carefully to avoid moving parts and maintain a clean look.
- Conceal cables behind interior panels and utilize factory grommets for hidden routing.
- Test and verify all connections for a professional finish that remains neat over time.

Gebildet Dash Cam Hardwire Kit, Type C USB Hard Wire Kit 12V-24V to 5V Hardwire Kit with Low Voltage Protection 13ft/320cm Car Dash Camera Charger Power Cord for Dashcam Supply Radar Detectors
【Low Voltage Protection】 Once the input voltage drops below 11.6V (23.2V for 24V input), the battery drain protection…
As an affiliate, we earn on qualifying purchases.
As an affiliate, we earn on qualifying purchases.
Why a Discreet Wiring Setup Matters for Your Dash Cam

A discreet wiring setup is essential because it keeps your dash cam both functional and unobtrusive. Wire concealment guarantees your vehicle’s interior remains tidy, preventing loose cables from cluttering your dashboard or windshield. Aesthetic wiring improves the overall look, making the installation appear clean and professional. When wires are hidden, you reduce the risk of accidental disconnections or damage from moving objects inside your car. Plus, a tidy setup minimizes distractions while driving, enhancing safety. Proper wire concealment also protects your wiring from wear and tear, extending the lifespan of your dash cam’s power source. Additionally, understanding the importance of a Free Floating wiring system can help you achieve a seamless and unobtrusive installation. This approach aligns with the energetic principles of maintaining clarity and focus, ensuring your setup remains both efficient and visually appealing. Incorporating wire management techniques can further optimize the installation process and longevity. Selecting energy-efficient components can also contribute to a more sustainable and reliable dash cam system. Implementing proper insulation further safeguards your wiring from environmental damage and electrical issues.

QZTYTY 4PCS Car Concealed Wire Cover, Car Wire Sleeve, Automotive Power Cord Cover, Car Interior Accessories Adhesive Cable Hidden Protector for Cords USB Video Audio Network Cables Sleeve Organizer
[Durable material] : The car cable management is made of PVC material, which has the characteristics of soft…
As an affiliate, we earn on qualifying purchases.
As an affiliate, we earn on qualifying purchases.
How to Choose the Right Dash Cam and Wiring Power Sources

Choosing the right dash cam and wiring power sources is essential to guarantee reliable performance and ease of installation. Wireless dash cams are a popular option because they eliminate the need for complex wiring, making installation cleaner and simpler. If you prefer a wired setup, look for models with low power consumption and compatibility with your vehicle’s power system. Battery-powered alternatives are convenient, especially if you want a portable solution or want to avoid running wires through your vehicle. Consider the camera’s resolution, field of view, and night vision capabilities to ensure it meets your needs. Ultimately, selecting a dash cam that matches your vehicle’s power options and your installation preferences will help you achieve a professional-looking, discreet setup. Understanding thermal behavior and power management can further improve your installation’s reliability and longevity, especially in extreme weather conditions. Additionally, paying attention to cable routing can prevent potential damage and maintain a clean appearance. Proper circuit protection is also crucial to safeguard your dash cam and vehicle’s electrical system from surges or faults. Incorporating proper ventilation can help manage heat buildup and extend the lifespan of your device.

UNIGT 180pcs Nylon Universal Cable Tie Buckle, Push Mount Cable Zip Tie with Car Wire Loom Routing Clips, Universal Compatible with GM Ford Trucks Cars Sedan UTV Engine Bay Self Locking Straps
Must have if you are doing a restoration of your cars or replacing some wiring in engine bay,…
As an affiliate, we earn on qualifying purchases.
As an affiliate, we earn on qualifying purchases.
Planning Your Wiring Route for a Hidden, Professional Finish
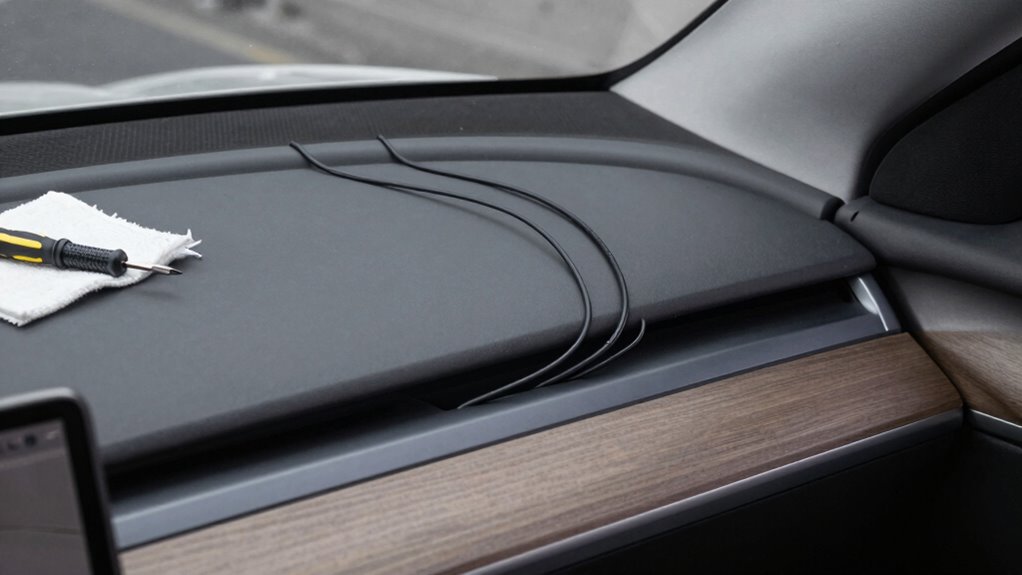
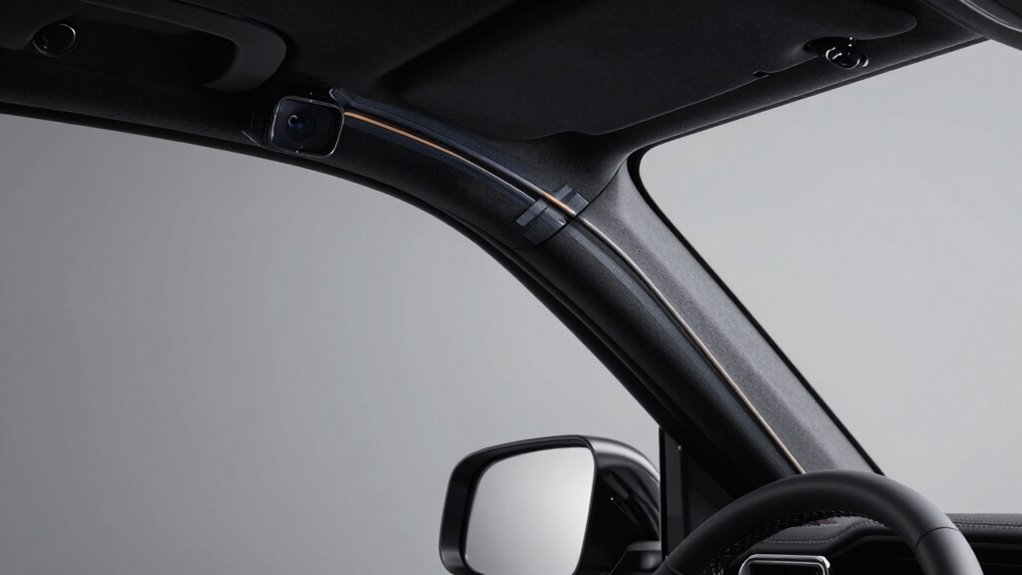
To achieve a clean, professional look, planning your wiring route carefully is essential before starting the installation. Begin by identifying the shortest, most direct wire routing from your dash cam to the power source, avoiding areas with moving parts or potential damage. Use concealment techniques such as tucking wires under trim panels, along existing wiring harnesses, or behind the headliner. Check your vehicle’s interior layout to find natural channels that hide wires neatly out of sight. Keep wires tight and secure with zip ties or clips, ensuring they don’t interfere with airbags or other components. Proper wire routing not only improves aesthetics but also prevents accidental disconnections or damage, resulting in a seamless, factory-like finish. Understanding vehicle interior layouts can help you choose the best path for your wiring, especially by considering styling techniques that enhance the overall appearance. Additionally, being aware of hidden wiring channels can further streamline your installation process. Incorporating proper securing methods ensures long-term durability and safety of your wiring setup, while also minimizing electrical interference that could affect device performance.

Dash Cam Installation Kit – Trim Removal Tool, 20 Strong Adhesive Cable Clips, Reusable Cable Ties, Split Sleeve & Foam Pads – Clean Car Wire Organizer
Hide Dash Cam Wires Like a Pro: Keep your dash cam installation clean and factory-looking. This complete kit…
As an affiliate, we earn on qualifying purchases.
As an affiliate, we earn on qualifying purchases.
What Tools and Materials You’ll Need for a Clean Installation

To guarantee a neat and professional-looking dash cam installation, you’ll need the right tools for precision work, like wire strippers and screwdrivers. Additionally, gather materials that help your setup blend seamlessly, such as adhesive mounts and cable clips. Having these on hand makes the process smoother and results look clean and secure. Paying attention to cable management ensures your wiring remains organized and unobtrusive. Using proper wiring techniques minimizes the risk of damage and keeps your installation looking factory-finished. Incorporating navigation and mapping principles can help you plan your wiring route effectively, reducing clutter and enhancing safety. Moreover, understanding circuit safety practices is essential to prevent electrical issues and ensure a secure connection. Considering wire routing methods can further improve both safety and aesthetics by guiding your cables along the most discreet paths.
Tools for Precision Work
Having the right tools and materials guarantees your dash cam installation is neat and secure. Precision work requires specific items like wire strippers, a pin pusher, and a soldering iron for clean connections and wire management. A pry tool helps hide cables behind panels without damage, while zip ties and adhesive clips keep wires organized and out of sight. A multimeter is essential to verify power sources and avoid shorts. For cable concealment, use a heat gun to soften adhesive-backed wire channels or sleeves. Fine-tipped pliers assist in manipulating small connectors and wires. Using proper wire management techniques ensures a professional-looking installation that minimizes clutter and looks discreet, maintaining a factory finish. Proper tools make all the difference in a seamless, tidy dash cam setup. Additionally, understanding piercing care and hygiene can help prevent unexpected issues if you ever need to hide or reroute wires around sensitive areas. To ensure safe and effective wiring, familiarity with electrical safety practices is highly recommended. Engaging in quality assessment of your components can also help ensure durability and reliability over time, especially when considering protective measures to safeguard against environmental factors.
Materials for Seamless Integration
Achieving a clean, professional dash cam installation depends on selecting the right materials to complement your tools. You’ll want supplies that guarantee a seamless look, whether you’re using wired setups or exploring wireless alternatives for a clutter-free interior. Essential materials include double-sided tape, cable clips, and adhesive mounts for dash cam mounting. These help hide wiring and create a factory finish. Incorporating connectivity options can further enhance your setup by reducing visible wiring and ensuring a tidy appearance. Using these materials, your dash cam will blend seamlessly, looking like a built-in feature rather than an aftermarket addition.
Connecting Your Dash Cam Without Visible Wires: Step-by-Step

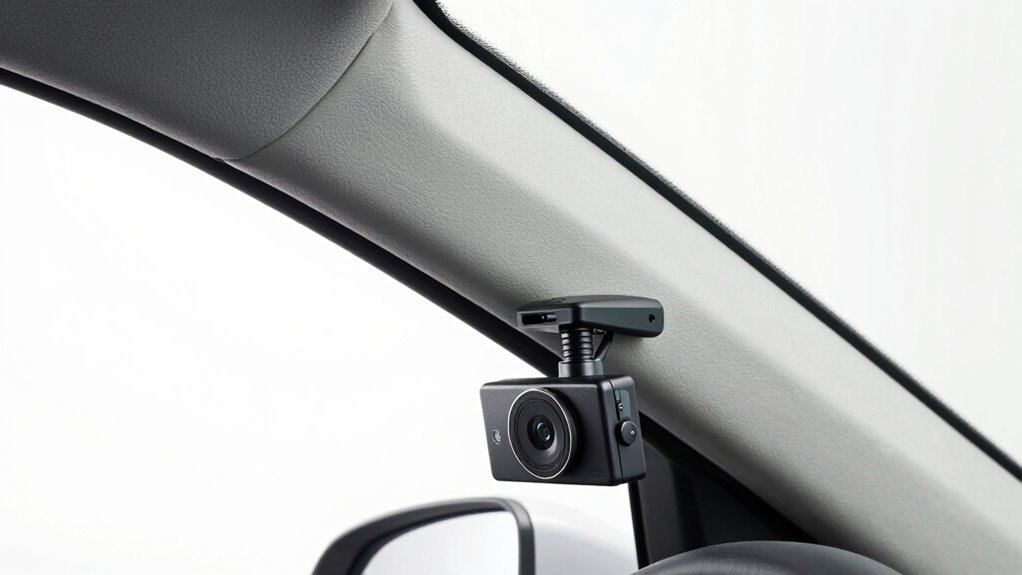
Connecting your dash cam without visible wires might seem challenging, but with the right approach, it’s straightforward. Start by planning your wire concealment techniques to keep everything neat. Use aesthetic wiring options like running cables along existing trim or behind panels to hide wires from view. Use a trim removal tool to gently tuck the cables into gaps and crevices, following the natural contours of your vehicle. Connect the power cable to a fuse tap or use a dedicated hardwire kit for a clean look. Secure loose wires with zip ties or adhesive clips, keeping them close to the vehicle’s structure. Take your time to ensure wires are hidden and secured properly, giving your install a professional, factory-like finish.
How to Tuck Wires Along Vehicle Panels and Structural Points
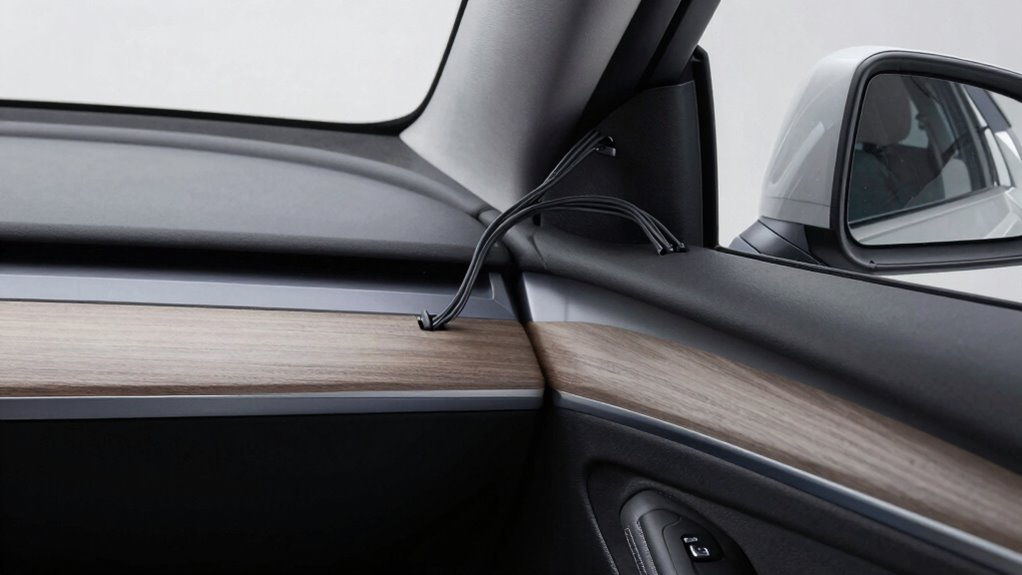
To tuck wires neatly along vehicle panels and structural points, start by identifying the best paths that follow existing contours and gaps. Use wire management techniques to route cables along these natural lines, keeping them out of sight and protected. Carefully access panels where possible to hide wires behind interior trim pieces; panel access is key to a clean setup. Gently pry panels away using trim tools, avoiding damage, and run the wires through these openings. Follow structural points like door sills or under the dashboard, securing wires with clips or tape as needed. Keep the wires tight but not strained, ensuring they stay out of the way of moving parts. Proper wire management along panels and structural points results in a tidy, professional-looking installation.
Using Connectors and Fittings for a Secure, Neat Wiring System
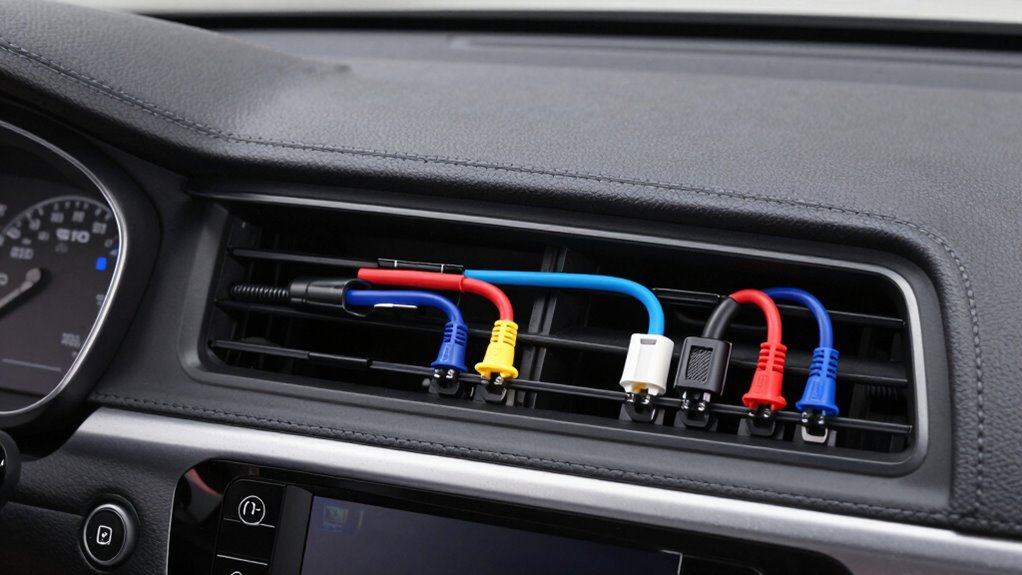
Using connectors and fittings is key to creating a wiring system that stays secure and looks tidy. They help organize wires and prevent damage, ensuring a clean, professional appearance. Choose the right wire connector types—such as crimp connectors, butt connectors, or terminal blocks—to match your wiring needs. Proper cable management techniques include securing wires with zip ties, routing them along panels, and using fittings to protect against abrasion. This prevents loose wires and clutter. Here are some tips:
Using connectors and fittings keeps wiring secure, organized, and professional-looking.
- Select connectors suited for your wire gauge and type
- Use fittings to join wires neatly and securely
- Keep cables organized with zip ties and clips
Testing Your Dash Cam Setup to Ensure Power and Recording
Before wrapping up your installation, it’s essential to verify that your dash cam powers on correctly and starts recording as intended. Turn on your vehicle and check if the dash cam’s display activates, indicating power flow. Ensure that the recording function works smoothly, and review footage to confirm clarity and proper framing. If your dash cam offers wireless alternatives, test their connectivity to your smartphone or app to ensure seamless access. Familiarize yourself with key dash cam features, like motion detection or loop recording, and verify they operate correctly. This step guarantees everything is functioning before finalizing your wiring. Proper testing prevents issues later and helps you enjoy the full benefits of your dash cam’s features, providing peace of mind while driving.
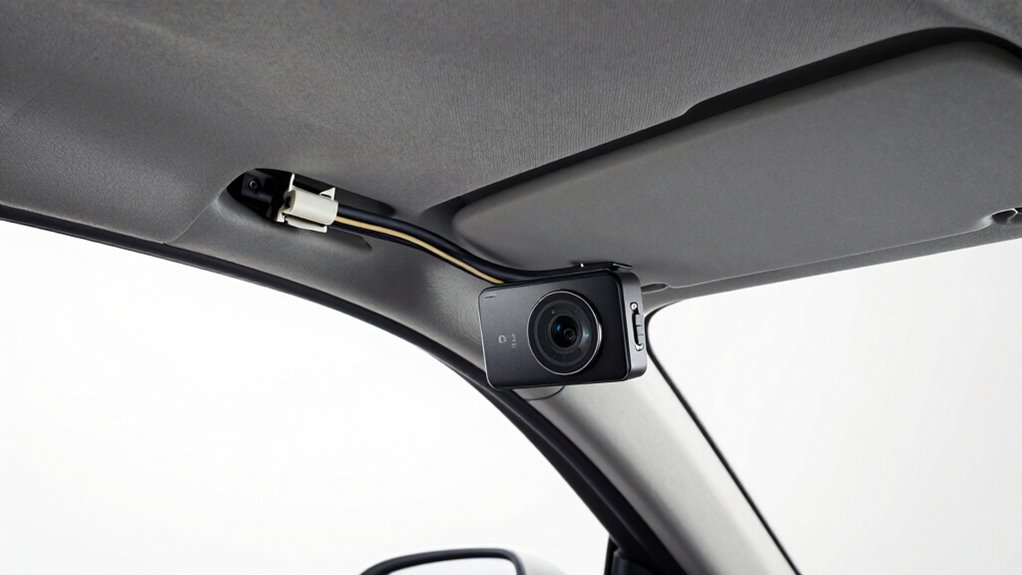
How to Keep Your Wiring Hidden and Neat Over Time
Once you’ve tested your dash cam and confirmed it functions properly, the next step is to keep the wiring neat and hidden. Proper wire routing ensures your cables stay out of sight and don’t interfere with your vehicle’s interior. Use cable clips or adhesive mounts to secure wiring along door frames, under panels, or behind trim pieces. Good power management involves hiding wires close to existing vehicle wiring harnesses, minimizing visible runs.
- Route wires along existing contours and through factory grommets
- Secure cables firmly to prevent sagging or movement
- Keep excess wire tucked away to avoid clutter and damage
Troubleshooting Common Wiring Problems and Fixes
Wiring issues are common and can disrupt your dash cam’s performance, but many problems have straightforward fixes. Start by double-checking wire color coding—incorrect connections often cause power or data issues. Make certain that the wires match the vehicle’s wiring diagram and that you’ve connected the right power and ground wires. If your dash cam isn’t turning on, verify your fuse tap selection; using the wrong fuse or an incompatible tap can cut power. When troubleshooting, inspect for loose connectors, damaged wires, or exposed conductors that might cause short circuits. Re-seat connections and replace any frayed wires. Remember, a clean, factory-like install depends on correct wiring and proper fuse tap selection, which guarantees reliable power and a neat appearance.
Frequently Asked Questions
Can I Install a Dash Cam Without Prior Electrical Experience?
Yes, you can install a dash cam without prior electrical experience. Wireless alternatives make setup easier, often requiring just a mount and a power bank option for power. You’ll find step-by-step guides helpful, and many dash cams come with user-friendly features. Just follow the instructions carefully, and you should be able to complete the installation smoothly. Using wireless options or a power bank helps keep things simple and mess-free.
What Are the Best Locations to Hide Wiring Inside My Vehicle?
Think of your car’s interior as a secret garden for hidden cable routes. To achieve factory wiring concealment, tuck the wiring along door sills, under trim panels, or behind the dashboard. Use existing grommets and clips to keep cables out of sight, avoiding any clutter or wires that look out of place. This way, your dash cam stays discreet, and the wiring blends seamlessly with your vehicle’s interior.
How Do I Disconnect and Troubleshoot Wiring Issues Safely?
To disconnect and troubleshoot wiring issues safely, start by turning off your vehicle and disconnecting the battery to prevent shocks. Use the appropriate wire connector types to safely disconnect wires. Then, employ voltage testing techniques with a multimeter to identify power issues or shorts. Carefully inspect all connections for damage or loose fittings, ensuring you follow safety protocols throughout the process to avoid injury or further damage.
Are There Specific Wiring Kits Recommended for Different Vehicle Models?
You should choose wiring harnesses that are specifically compatible with your vehicle model to guarantee a seamless fit. Many brands offer wiring kits tailored for different vehicle compatibility, making installation easier and cleaner. Check your dash cam’s manufacturer recommendations or consult with a professional to find the right wiring kit. Using the correct wiring harnesses prevents wiring issues, maintains factory look, and ensures your dash cam functions reliably.
How Often Should I Inspect and Maintain Hidden Wiring Connections?
You should inspect your hidden wiring connections every 6 to 12 months to make certain wiring corrosion hasn’t occurred and connection stability remains intact. Regular checks help you catch issues early, preventing potential damage or malfunction. Look for signs of corrosion or loose connections, and clean or tighten them as needed. Proper maintenance keeps your dash cam wiring looking factory-finished and ensures reliable performance over time.
Conclusion
With a clean wiring setup, your dash cam becomes a seamless part of your vehicle’s interior, almost invisible as it quietly records every moment. Picture the sleek, hidden cables weaving through tight spaces, like a spider’s web tucked away behind the dashboard. When you finish, your car feels neater, safer, and more professional — a smooth, unobtrusive eye watching over your journeys, ready to capture every detail without clutter or distraction.