
To stop your video doorbell from recording only foreheads and driveways, start by repositioning the camera closer to the front door and angling it downward to focus on the walkway and entryway. Use tools like a level and screwdriver to adjust its height and tilt, ensuring it’s aimed at visitors rather than irrelevant areas. Fine-tune the motion zones within the app to exclude driveways or streets. Keep the lens clean and check the footage regularly for ideal results—more tips follow if you want to perfect your setup.
Key Takeaways
- Reposition the doorbell camera to face the entrance directly, avoiding angled shots of driveways or sidewalks.
- Adjust the camera’s tilt and rotation to capture faces and activity near the door, not overhead or distant views.
- Use motion zone settings within the app to exclude driveways, streets, and areas showing foreheads or irrelevant spaces.
- Ensure proper lighting and reduce glare to improve image clarity and prevent false recordings of unwanted areas.
- Regularly review footage and fine-tune camera angles and motion zones for optimal coverage and minimal irrelevant recordings.
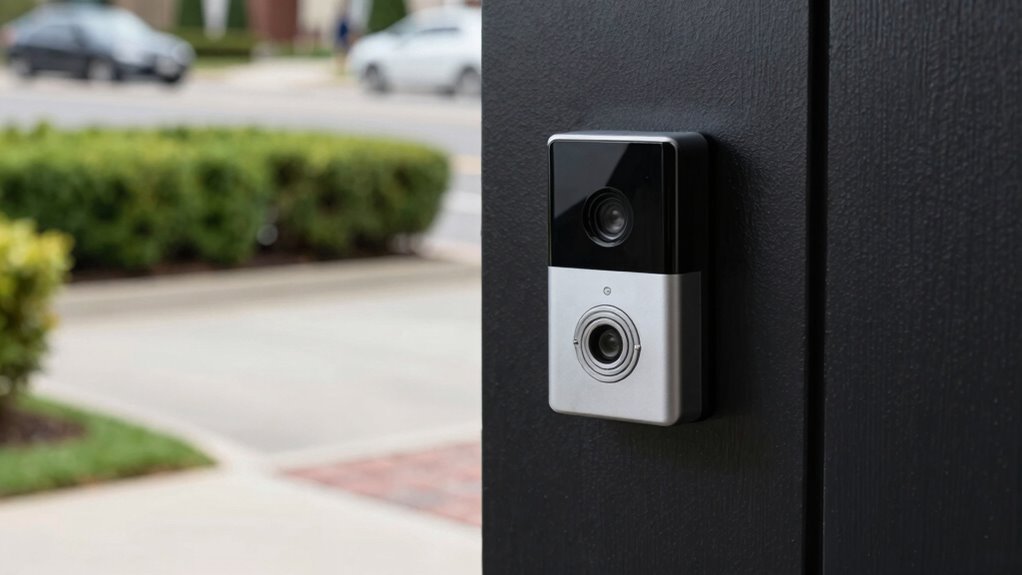
adjustable video doorbell mount
As an affiliate, we earn on qualifying purchases.
As an affiliate, we earn on qualifying purchases.
Why Your Doorbell Camera’s Angle Matters for Clear Footage
Your doorbell camera’s angle directly impacts the clarity of the footage it captures. Proper camera placement guarantees you record what truly matters—visitors, package deliveries, or suspicious activity. If the camera is too high or too low, you might miss important details like faces or license plates. Angle adjustment is key; you want the camera aimed at the most relevant area without creating blind spots. Adjust the angle so it captures the pathway and entrance clearly, avoiding excessive sky or ground. A well-placed camera with the correct angle helps you identify visitors quickly and reduces the chances of missing critical footage. Taking the time to optimize your doorbell’s placement and angle ensures you get clear, useful recordings every time. Simple strategies for camera placement make maintaining your system easier and more effective. Ensuring your camera’s field of view is properly calibrated can further improve footage quality and coverage. Additionally, choosing an optimal mounting height can prevent unwanted obstructions and enhance overall visibility. Proper camera alignment is essential for avoiding blind spots and ensuring comprehensive coverage of your entryway.

Video Doorbell Key Removal Tool Compatible with Ring Battery Doorbell 2024 Release, Wired Doorbell Pro (N ewest Model), Wired Doorbell Plus (N ewest Model) 2PACK
COMPATIBILITY: compatible with Ring Battery Doorbell 2024 Release,Compatible with Wired Doorbell Pro (Newest Model), Wired Doorbell Plus (Newest…
As an affiliate, we earn on qualifying purchases.
As an affiliate, we earn on qualifying purchases.
Common Mistakes That Make Your Camera Capture the Wrong Areas

One common mistake that causes your camera to capture the wrong areas is positioning it too high or too low. Poor camera placement affects what the camera sees and can lead to unwanted footage of the sky, street, or your neighbors’ yards. To avoid this, focus on proper angle calibration when installing your doorbell. Ensure the camera faces the right direction, capturing your porch and walkway instead of just the sky or ground. Misaligned angles can also cause the camera to record irrelevant areas like the driveway or your neighbor’s house. Take the time to adjust the camera’s position carefully, testing different angles until you find the best view. Correct camera placement and angle calibration are essential to get footage that’s useful and relevant. Additionally, understanding the field of view helps you optimize camera placement for maximum coverage. Proper installation techniques can help prevent these common issues and ensure your camera captures the intended areas effectively. Being aware of camera positioning best practices can significantly improve the quality of your footage.

Orbitell 1080p Wireless Wi-Fi Video Doorbell Camera with Two Way Audio, Night Vision, Cloud Storage, Smart AI Motion Detection, Support 2.4GHz Wi-Fi only
AI-Powered Smart Detection: Advanced AI technology accurately identifies people while filtering out vehicles and animals, so you only…
As an affiliate, we earn on qualifying purchases.
As an affiliate, we earn on qualifying purchases.
How to Check Your Doorbell Camera’s Current Position
To verify your doorbell camera’s current position, start by reviewing the live feed through the app or device interface. Observe the camera alignment and see if it captures your desired area, like the porch or driveway. If it shows too much of the sky or your neighbors’ yards, you may need an angle adjustment. Use the table below to help evaluate what’s visible:
| What to Look For | Desired Outcome |
|---|---|
| Foreheads and driveways visible | Focus on entrance and walkway |
| Unwanted sky or street view | Reduce angle to exclude these |
| Proper lighting conditions | Ensure clear footage |
| Camera tilt or misalignment | Adjust to improve framing |
| Obstructions or glare | Clear obstructions for better view |
This quick check helps you determine if your camera’s current position needs fine-tuning for ideal coverage. Ensuring your camera’s field of view is properly aligned can also prevent angle misalignment and improve overall footage quality. Additionally, understanding camera positioning principles can help you achieve the best angle for comprehensive monitoring. Regularly checking your camera angle can prevent issues caused by external factors like weather or accidental bumps.

Aispour Camera Lens Cleaning Kit, 10-in-1 Camera Cleaning Kit, Camera Lens Cleaner and Camera Accessories, Includes Lens Cleaning Kit/Lens Cleaner/Lens Cleaning Pen/Soft Brush
WHAT YOU CAN GET: 1 camera lens Cleaner 50ml + 1 air blower + 1 two in one…
As an affiliate, we earn on qualifying purchases.
As an affiliate, we earn on qualifying purchases.
Tools and Accessories Needed to Reposition Your Video Doorbell

Gathering the right tools and accessories makes repositioning your video doorbell straightforward and hassle-free. You’ll need essential installation accessories like screws, anchors, and a mounting bracket compatible with your doorbell model. Mounting tools such as a drill, screwdriver, level, and possibly a pencil for marking holes are vital. Confirm you have a compatible power drill if your doorbell requires additional wiring or if existing holes need adjusting. A smartphone or camera can help verify the new position once installed. Having these tools on hand minimizes delays and makes the process smoother. Double-check that all accessories are suitable for your wall type—whether brick, wood, or siding—to guarantee secure installation. Proper preparation ensures your repositioned doorbell stays in place and records only what you want. Additionally, understanding the regulatory and privacy considerations in Europe can help avoid unintended data collection issues during installation.
Step-by-Step: How to Reposition Your Doorbell Camera for Better Coverage

Repositioning your doorbell camera for better coverage involves several clear steps to ensure the new placement provides ideal visibility. First, choose a spot that captures the walkway and entrance without including excessive sky or porch details. Remove the camera from its current mount and adjust the camera placement to face the desired area directly. When repositioning, focus on angle adjustment to get a clear view of visitors, avoiding shots that record only foreheads or driveways. Use a level if available to guarantee the camera is straight. Test the new position by viewing live footage or recordings, making small tweaks as needed. Confirm that the camera angle captures the most important areas, and secure the camera firmly to prevent shifting over time. Additionally, consider local automation options to optimize camera placement based on routines and environmental factors. Understanding the field of view of your camera can help you make more precise adjustments for optimal coverage, and exploring camera specifications can provide further insights into its capabilities.
Tips for Finding the Best Camera Angle at Your Front Door

Finding the best camera angle at your front door starts with understanding what you want to see most—whether it’s visitors, packages, or the driveway. To optimize your footage, consider lighting techniques that illuminate key areas without washing out details. Good lighting ensures clear images day or night. Also, be mindful of privacy considerations; avoid angles that capture neighbors’ property or personal spaces. Use the table below to help visualize common focus points:
| Focus Area | Tips |
|---|---|
| Visitors | Adjust angle for facial visibility |
| Packages | Cover porch and entryway |
| Driveway | Capture vehicles and movement |
Balancing lighting and privacy helps you get a clear, respectful view, making your doorbell more effective. Understanding the importance of camera placement can greatly enhance your overall security footage. Additionally, reviewing your camera angle periodically can help ensure it continues to meet your needs as your surroundings change, and experimenting with different positions can reveal the most effective view for your specific setup. Incorporating knowledge about security camera technology can help you choose the best equipment for your needs.
How to Test and Verify Your Repositioned Camera Angle

Once you’ve adjusted your camera to the desired angle, it’s important to test its view to make sure it captures what you want. Walk through different times of the day to see how lighting affects the camera resolution and image clarity. Check that it records only the areas you want, addressing privacy concerns by avoiding unwanted zones like neighbors’ property or sidewalks. Use your smartphone or computer to review footage, ensuring the camera isn’t recording unnecessary spaces like driveways or faces. Adjust the angle if needed, then retest. Confirm that the camera’s view aligns with your privacy preferences and that the resolution provides clear images of visitors without capturing unwanted backgrounds. Proper testing guarantees your camera is optimized for privacy and effective surveillance. Remember to verify that your camera’s angle supports your overall safety and convenience goals for smarter surveillance. Additionally, consider the cameras’ field of view to ensure comprehensive coverage without unnecessary blind spots. Regularly inspecting your camera’s repair and maintenance can prevent technical issues that compromise security.
What to Do If Your Camera Still Records the Wrong Areas
If your camera still records the wrong areas, start by adjusting its angle to better cover the desired zone. Then, use motion zone settings to block out irrelevant spots and focus on key areas. If needed, reposition the doorbell camera itself for a more accurate view. Additionally, ensuring your camera has the latest firmware can improve its connectivity and accuracy, leading to better coverage of your intended areas. Regularly updating your camera settings can also help optimize its performance over time. Incorporating proper installation techniques can further enhance the camera’s field of view and effectiveness, preventing unwanted recordings. To maintain reliable operation, also consider verifying your Wi-Fi strength and placement, as a stable connection supports optimal camera performance.
Adjust Camera Angle Properly
Have you ever adjusted your video doorbell’s angle only to find it still records the wrong areas? It’s likely your camera placement or angle adjustment needs fine-tuning. First, reposition the camera to face the entrance directly, avoiding obstructions like overgrown bushes or porch furniture. When making angle adjustments, use a level or smartphone app to ensure the camera is tilted downward enough to capture visitors’ faces, not just their foreheads or driveway. Test the view by someone walking past or ringing the doorbell, then review the footage. Small tweaks, like tilting the camera slightly up or down, can make a big difference. Proper camera placement combined with precise angle adjustment guarantees your doorbell records only the areas you care about.
Use Motion Zone Settings
When your camera continues to record unwanted areas despite proper placement and angle adjustments, tweaking the motion zone settings can assist. Start by adjusting the lighting settings if your camera struggles with glare or shadows that trigger false alerts. Proper lighting adjustments improve camera calibration, ensuring motion detection focuses only on relevant areas. Use the app’s motion zone feature to draw boundaries around your driveway and exclude the sidewalk or street. Narrowing these zones minimizes false recordings of moving trees or passing cars. Regularly review and fine-tune these settings to ensure they adapt to changing lighting conditions and seasonal shifts. This targeted approach helps your camera focus solely on critical zones, reducing unnecessary recordings and keeping your footage relevant.
Reposition Doorbell Camera
Sometimes, despite adjusting the camera’s angle and settings, it still captures unwanted areas. If that happens, consider repositioning your doorbell camera. Proper camera placement is key to avoiding unnecessary footage of driveways or faces you don’t want to record. Start by removing the camera from its current spot and testing different angles. Use a level or visual guides to ensure it’s aimed precisely where needed. When making angle adjustments, focus on capturing the doorway or front porch without including the street or neighboring yards. Remember, small tweaks can make a big difference. Repositioning your camera allows you to fine-tune the view, ensuring it records only the areas you want, and eliminates the need for constant zone adjustments later.
Best Practices for Maintaining Your Doorbell Camera’s Proper Angle
To guarantee your doorbell camera captures clear, useful footage, regularly check and adjust its angle so it faces the right spot. Proper camera placement tips are essential for effective video doorbell maintenance. Ensure your camera points at the doorstep and not at irrelevant areas like the sky or parked cars. Use a level to keep it straight and avoid tilt. Regularly clean the lens to prevent dirt buildup, which can obscure footage. Test the camera’s view after adjustments to confirm it covers the intended area. Adjustments should be minor but precise to prevent recording unwanted zones like driveways or foreheads. Here’s a quick reference:
| Adjustment Step | Focus Area | Tools Needed |
|---|---|---|
| Check angle | Front door and walkway | Level, screwdriver |
| Clean lens | Entire camera surface | Soft cloth |
| Test footage | Entryway area | Smartphone or monitor |
| Fine-tune position | Specific zones | Small adjustments |
Additional Tips to Optimize Your Video Doorbell Footage

To get the best footage from your doorbell, start by adjusting the camera angles for a clear view. Next, optimize your motion zones to focus on key areas and reduce false alerts. Finally, make sure your lighting is bright and even to improve video clarity during nighttime or low-light conditions.
Adjust Camera Angles
Adjusting the camera angle on your video doorbell is essential for capturing clear, useful footage. Proper camera placement and precise angle adjustment ensure you focus on your porch and entryway, not the lawn or street. To do this effectively, test different angles until you find the best view that captures visitors without unnecessary background. Remember, small shifts can make a big difference in footage quality.
| Emotion | Impact |
|---|---|
| Confidence | You’ll trust your footage to identify visitors accurately. |
| Security | Proper angles reduce blind spots, keeping your home safer. |
| Satisfaction | Clear views bring peace of mind and less frustration. |
| Control | You’re in charge of your camera’s perspective, customizing it to your needs. |
Optimize Motion Zones
Optimizing your motion zones guarantees your video doorbell only records what matters most, reducing false alerts and conserving storage space. To do this effectively, focus on camera placement, ensuring your doorbell covers key areas like the pathway and porch, while excluding irrelevant spots like the street or driveway. Proper lighting optimization is also vital; position the camera where lighting conditions are consistent and avoid glare or shadows that could trigger false alarms. Adjust the motion zones within your app to precisely target high-traffic zones and exclude areas prone to motion from trees or passing cars. Regularly review footage to fine-tune these zones. This approach helps you catch important activity without unnecessary recordings, making your doorbell smarter and more efficient.
Use Clear Lighting
Clear lighting is essential for capturing high-quality footage with your video doorbell. Proper lighting techniques ensure your camera can distinguish faces and details, reducing blurry or shadowy recordings. To maximize clarity, position your doorbell where it benefits from natural or well-placed artificial light, avoiding overly dark or backlit areas. Adjust your camera positioning to face well-lit zones, eliminating shadows that obscure motion or facial features. If possible, add external lighting or motion-activated lights to enhance visibility during nighttime or low-light conditions. Consistent, even lighting helps your doorbell record sharp, detailed footage, making it easier to identify visitors and events. Remember, good lighting is key to reliable security footage, so optimize your camera placement and lighting setup accordingly.
Frequently Asked Questions
Can I Adjust My Doorbell Camera Remotely to Change Angles?
Yes, you can usually adjust your doorbell camera remotely for better angle placement. Most modern doorbells offer app-based controls that let you tweak the camera placement or angle adjustment without needing to physically move the device. Check your camera’s app settings, and look for options like “view adjustment” or “angle control.” This way, you can optimize your camera placement for better coverage and avoid recording unwanted areas like foreheads or driveways.
What Is the Ideal Angle to Prevent Recording Unwanted Areas?
Did you know that improper camera placement can capture up to 50% more unwanted footage? To prevent recording unwanted areas and address privacy concerns, angle your doorbell camera slightly downward, focusing on the porch and pathway. Avoid pointing it directly at neighbors’ windows or driveways. This way, you maintain clear surveillance while respecting privacy, ensuring you only record what’s essential for security without invading others’ privacy.
Are There Specific Brands That Offer Better Angle Adjustments?
Yes, some brands excel in camera placement and angle calibration. Ring and Nest, for example, offer adjustable mounts and wide-angle lenses, making it easier for you to fine-tune the recording area. Look for models with flexible mounting options and easy-to-use calibration tools. These features help you direct the camera to focus on your desired zone, avoiding unwanted recordings of foreheads and driveways.
How Often Should I Reposition My Doorbell Camera?
Think of your doorbell camera as a vigilant guardian, constantly needing a fresh perspective. You should reposition it whenever your security concerns change or after significant home renovations. Regular adjustments ensure ideal coverage, avoiding blind spots and unnecessary recordings of driveways or foreheads. Follow installation tips like mounting at eye level and angling slightly downward. Rechecking every few months helps maintain a clear view, keeping your home safe and your footage relevant.
Does Repositioning Affect the Camera’s Motion Detection Sensitivity?
Repositioning your doorbell camera can impact its motion sensitivity because it may require camera calibration. When you change the angle or location, the camera’s motion detection settings might need adjustment to maintain accuracy. Keep in mind that recalibrating guarantees the camera detects relevant motion without false alerts. So, after repositioning, check and fine-tune your camera’s calibration to optimize motion sensitivity and avoid missing important activity.
Conclusion
By fine-tuning your doorbell camera’s angle, you guarantee it captures the areas that matter most—your porch and visitors, not just foreheads or empty driveways. Think of it as giving your camera a clear eye, so it can do its job without constantly playing hide and seek. With a little adjustment and regular checks, your footage will be sharp, focused, and ready to protect your home like a trusty guard dog.